¶ 英文写作
测试环境:Debian 11
英文写作通常使用pdflatex。
# pdflatex
sudo apt install -y texlive-latex-base
# biblatex.sty
sudo apt install -y texlive-bibtex-extra
# xkeyval.sty
sudo apt install -y texlive-latex-recommended
# xstring.sty
sudo apt install -y texlive-latex-extra
# libertine
sudo apt install -y texlive-fonts-extra
# algorithm.sty
sudo apt install -y texlive-scienceSIGMOD的模板不知道为什么还需要安装texlive-xetex:
sudo apt install texlive-xetex
make -j$(nproc)
¶ 中文写作
测试环境:deepin 15.11
由于xetex对中文的支持较好,为了节约磁盘空间和安装时间,就只安装xetex。
在终端中执行以下命令
sudo apt-get install -y texlive-xetex
# Install chinese font package
sudo apt-get install -y latex-cjk-all
# Install fonts such as consolas
sudo apt-get install -y texlive-fonts-extra
# 也许可以不要?
sudo apt-get install -y texlive-lang-english texlive-lang-chinese
sudo apt-get install -y texstudio perl-tk
安装时间较长。安装完后就可以使用vim或vscode或texstudio编写latex了。
样例(第一行用于指定编译器):
% !TEX program = xelatex

\documentclass[UTF8]{ctexart}
\title{test}
\author{searchstar}
\date{}

\usepackage{float}
\usepackage{graphicx}
\usepackage{amsmath}
\usepackage{CJK}
\usepackage{amsfonts}
\usepackage{amssymb}
\usepackage{amsthm}
\usepackage{verbatim}
\usepackage{tabto}	%tab
\usepackage{mathtools}
\usepackage{enumerate}

\usepackage{geometry}
\geometry{top=1.5cm, bottom=1.5cm, right=2cm, left=2cm}

\usepackage{listings}
\usepackage{xcolor}
\usepackage{fontspec}

\usepackage{inconsolata}

\fontspec{inconsolata}
\setmonofont[StylisticSet=1]{inconsolata}	%1 or 3???

\newtheorem{theorem}{定理}[section]
\newtheorem{definition}{定义}[section]
\newtheorem{lemma}{引理}[section]

\begin{document}
	\maketitle

	\lstset{ %
		backgroundcolor=\color{white},   % choose the background color; you must add \usepackage{color} or \usepackage{xcolor}
		basicstyle=\ttfamily,			 %ttfamily is consolas
		breakatwhitespace=false,         % sets if automatic breaks should only happen at whitespace
		breaklines=true,                 % sets automatic line breaking
		deletekeywords={...},            % if you want to delete keywords from the given language
		escapeinside={\%*}{*)},          % if you want to add LaTeX within your code
		extendedchars=true,              % lets you use non-ASCII characters; for 8-bits encodings only, does not work with UTF-8
		keepspaces=true,                 % keeps spaces in text, useful for keeping indentation of code (possibly needs columns=flexible)
		morekeywords={*,...},            % if you want to add more keywords to the set
		% numbers=left,                    % where to put the line-numbers; possible values are (none, left, right)
		numbersep=5pt,                   % how far the line-numbers are from the code
		numberstyle=\ttfamily,
		rulecolor=\color{black},         % if not set, the frame-color may be changed on line-breaks within not-black text (e.g. comments (green here))
		showspaces=false,                % show spaces everywhere adding particular underscores; it overrides 'showstringspaces'
		showstringspaces=false,          % underline spaces within strings only
		showtabs=false,                  % show tabs within strings adding particular underscores
		stepnumber=1,                    % the step between two line-numbers. If it's 1, each line will be numbered
		tabsize=4,                       % sets default tabsize to 2 spaces
		columns=fullflexible,
	}

	\begin{lstlisting}
Hello world!
00000
	\end{lstlisting}

\end{document}
保存为sample.tex
以下三种方法任选一种
用texstudio打开,按F5即可编译并查看。
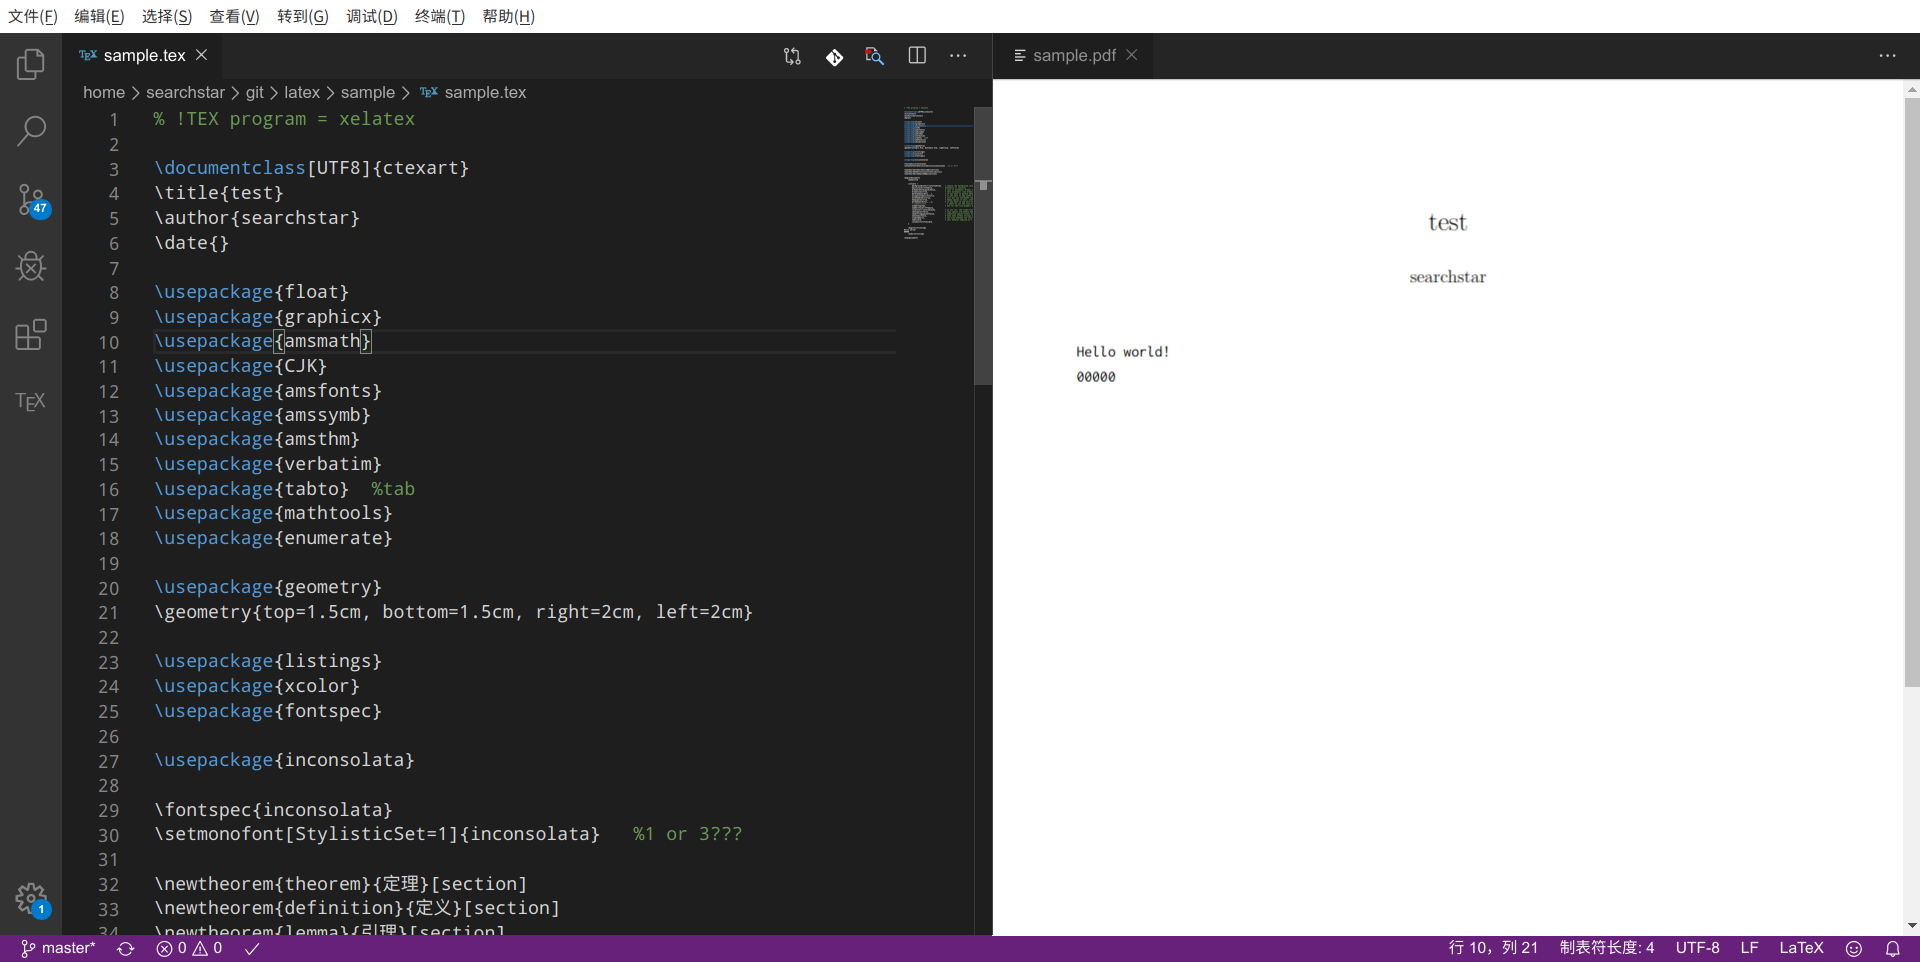
用vscode打开,安装插件LaTeX language support,LaTeX Workshop,latex-formatter,然后重启vscode,回到刚刚打开的sample.tex的文本界面,按ctrl+s即可编译,然后点击右上角的这个图标

就可以预览编译结果了。
- 使用vim
在~/.vim下新建一个tex.vimrc,内容:
set ts=4
set sw=4
set softtabstop=4
set smartindent	" next level indent

func! Compile_pdflatex()
	exec "!pdflatex %"
endfunc

func! Compile_xelatex()
	exec "!xelatex %"
endfunc

func! View()
	exec "!evince %<.pdf&"
endfunc

map <F6> :w<CR>:call Compile_pdflatex()<CR>
map <F7> :w<CR>:call View()<CR>
map <F5> <F6><F7>

map <C-F9> :w<CR>:call Compile_xelatex()<CR>
map <F9> <C-F9><F7>
其中evince是一种文档查看器,如果没有可以自己安装。
在~/.vimrc中加入:
syntax on
set nu
set autoindent	" same level indent

map <C-A> ggvG$"+y
autocmd FileType tex source ~/.vim/tex.vimrc
保存退出后重启vim,然后用vim打开sample.tex文件,按F9即可编译并预览。
有时可能需要重启电脑才能使tex.vimrc的配置生效。如果还没有生效,就重启两次(手动狗头)。如果还不行,就把tex.vimrc中的内容直接搬到~/.vimrc里,然后把autocmd那行删掉。